 how-to
Commercial Masonry Maintenance Tips for Safer Buildings
Last Updated: November 14, 2026
Quick Summary
Commercial masonry maintenance means inspecting and caring for brick, stone, and concrete block to limit damage and keep a building in service. Record defects and changes, address water entry, and prioritize loose or falling masonry for prompt professional assessment. Plan repairs according to the cause, material, and risk rather than patching every visible flaw.
- Walk the same inspection route and photograph findings from the same angle.
- Check vulnerable areas after severe weather and during routine site walks.
- Trace dampness to its entry point before choosing a repair.
- Keep a record of each finding’s location, severity, photo, repair status, and follow-up date.
Table of Contents
- Commercial Masonry Maintenance Tips Start With a Risk-Based Plan
- Commercial Brick Inspection Checklist for Walls, Joints, and Lintels
- Commercial Masonry Maintenance Schedule by Season
- Commercial Masonry Water Damage Prevention Around the Building Envelope
- Commercial Masonry Cleaning Methods for Brick and Stone
- Prioritize Cracks, Loose Units, and Mortar Deterioration
- Budget for Repairs and Keep a Masonry Maintenance Record
- Choose Compatible Repairs and Know When to Call a Mason
- Request a Masonry Assessment from Solid Rock Brick Masonry
- Frequently Asked Questions
Commercial Masonry Maintenance Tips Start With a Risk-Based Plan
According to IBISWorld’s 2026 U.S. masonry market-size estimate, the industry is estimated at $34.8 billion. That figure describes the market, not the results of maintenance. This guide from blog.solidrockbrick.com explains how property managers can spot trouble early and plan work by risk. The goal is simple: protect the building before a small defect grows.
Commercial masonry maintenance tips work best as a plan, not a list of one-off fixes. Masonry maintenance is the planned inspection and care of brick, stone, and concrete block to limit damage and keep a building in service. At Solid Rock Brick Masonry, we specialize in crack repair, and our structural expertise informs how we think about signs that need a closer look.
A common mistake is to treat every crack as the same problem. A fine, stable crack calls for a different response than a widening crack near a lintel or a loose brick above an entrance. The first task is to record what you see, where it is, and whether it changes.
Use this simple risk scale:
- Low: Surface stain or small, stable flaw
- Moderate: Open joint, recurring damp spot, or growing crack
- Urgent: Loose masonry, falling pieces, or a visibly shifting wall
The U.S. Army Construction Engineering Research Laboratory’s 1995 report documents case histories of repair and restoration to damaged brick and stone structures. It supports a practical lesson: assess the damage before choosing the repair. Repair and Maintenance of Masonry Structures: Case Histories
Commercial Brick Inspection Checklist for Walls, Joints, and Lintels
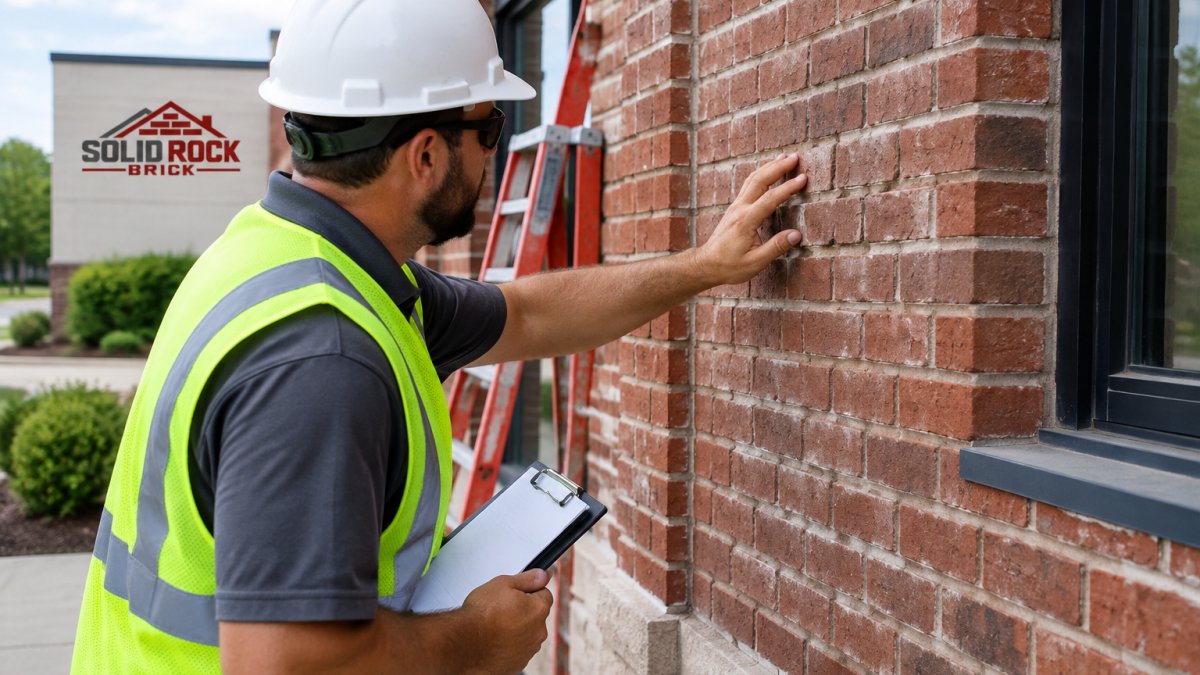
A commercial brick inspection checklist should cover the wall surface, mortar joints, openings, and areas where water can enter. Look for changes, not just defects: a crack that grows, a joint that keeps shedding mortar, or a lintel that appears to sag deserves more attention than an old mark that stays the same.
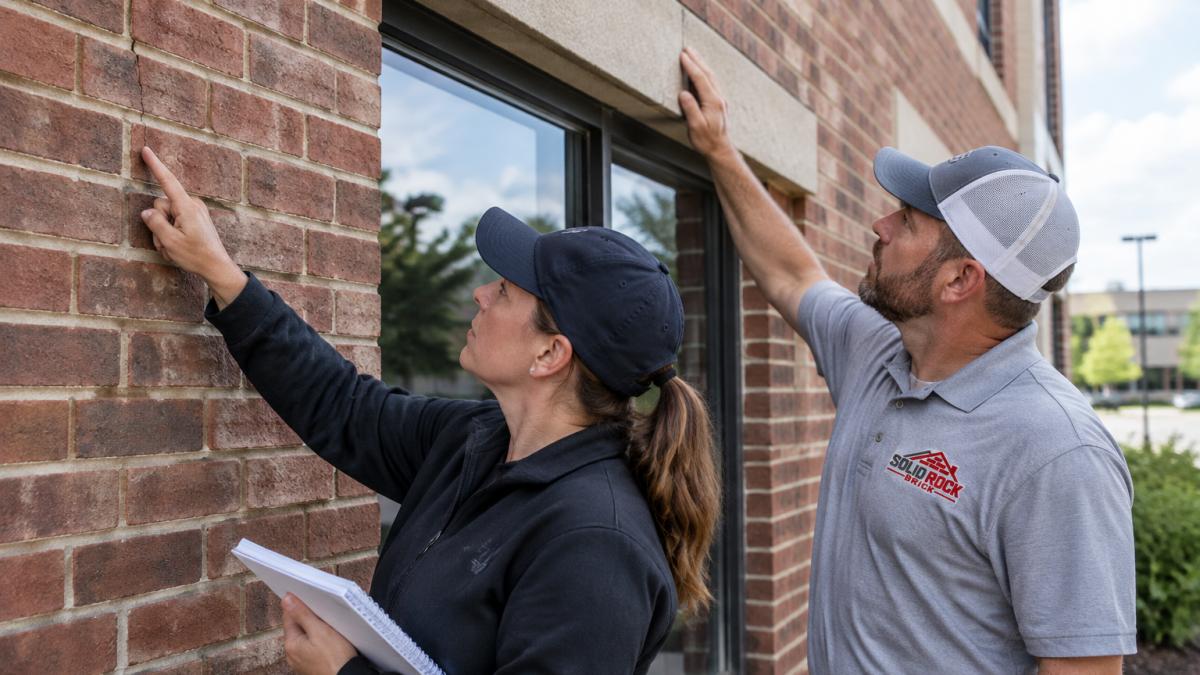
Walk the same route during each periodic inspection. That makes it easier to compare notes and spot new facade damage. Check:
- Brick, stone, and concrete block for cracks or loose units
- Mortar joints for gaps, crumbling, or past patching
- Lintels above doors and windows for rust stains or movement
- Sealant and expansion joints for gaps or loss of adhesion
- Wall bases, roof edges, and openings for damp marks
- Concrete balconies and ledges for cracks or loose pieces
Record the location and date, then take a clear photo from the same angle. A commercial brick inspection checklist is useful only if someone can compare it with the next one. CAP Masonry’s asset-preservation guidance includes routine inspections, joint care, preventative tuckpointing, and cleaning as common maintenance actions. Commercial Masonry Asset Preservation for Building Owners
Commercial Masonry Maintenance Schedule by Season
A commercial masonry maintenance schedule pairs repeat checks with seasonal risks, so teams address small changes before they become urgent repairs. There is no single schedule for every building; exposure, materials, and past repairs matter. Set a baseline inspection, then check vulnerable areas after severe weather and during routine site walks.
| Timing | Check | Record or action |
|---|---|---|
| Spring | Cracks, joints, lintels | Note winter changes |
| Summer | Sealants, facade, stains | Plan needed repairs |
| Fall | Drainage, openings, joints | Clear water paths |
| After severe weather | Loose units, new cracks | Restrict access if unsafe |
A seasonal inspection should focus on the parts most exposed to rain, heat, and movement. The same wall can need different attention depending on shade, drainage, and nearby building features. Don’t treat the table as a substitute for a qualified inspection when you see movement or loose masonry.
Keep the record simple: date, area checked, condition, photo, and next action. This is where many plans fail. Teams inspect, but don’t write down what changed, so the next person has no baseline. A clear commercial masonry maintenance schedule turns observations into work orders rather than forgotten notes.
Commercial Masonry Water Damage Prevention Around the Building Envelope
Commercial masonry water damage prevention depends on tracing water to its entry point and correcting the path that carries it into or across the wall. A damp interior stain is evidence of moisture, not proof that the nearest exterior crack is the source. Water can travel along a lintel, behind a finish, or through a failed joint before it appears indoors.
Use a repeatable check after rain and during routine facade walks:
- At the roof edge: Look for overflowing gutters, blocked roof drains, loose flashing, and water spilling onto the wall. Note whether staining begins below the roofline or at a specific drain.
- At openings: Inspect sealant around windows and doors for gaps, separation, or hardened material. Check the lintel and the masonry immediately above and below it for rust staining, cracks, or recurring dampness.
- At joints and transitions: Look for open expansion joints, failed patches, and gaps where masonry meets another material. Record the full length of the defect rather than only its most visible point.
- At the wall base: Check whether downspouts discharge beside the foundation, soil or paving slopes toward the building, or splashback repeatedly wets the lower courses.
- Inside the building: Record the location and timing of stains, peeling finishes, or musty areas, then compare them with exterior observations after rainfall.
A useful record includes the date, recent weather, exact location, a photograph, and whether the area was wet or dry when checked. Repeated observations can help a qualified professional distinguish a one-time spill or condensation issue from a recurring envelope leak. White deposits, for example, can indicate that moisture has moved through masonry and left salts at the surface, but they do not identify the entry point on their own.
Prioritize the source before selecting a repair. A failed sealant joint may need removal and replacement; a blocked drain needs its water path corrected; deteriorated mortar may require compatible repointing. Applying a coating over a moving crack or wet wall can conceal symptoms without stopping the cause, and may complicate later assessment.
Watch out: If water is entering near electrical equipment, a ceiling is bulging, or masonry is loose, keep people away from the affected area and arrange prompt professional assessment rather than waiting for the next scheduled inspection.
After repairs, document what was changed and recheck the same locations after suitable rainfall. This closes a gap in many basic maintenance guides: the work is not verified simply because the visible stain has been cleaned or the joint has been patched. The maintenance guidance in RestoreWorks’ commercial-property article also identifies facade components, lintels, and sealants as inspection points. Summer Masonry Maintenance Tips for Commercial Properties
Commercial Masonry Cleaning Methods for Brick and Stone
Commercial masonry cleaning methods should be selected only after identifying the masonry, the deposit, and the condition of the surface. Brick, stone, and mortar can respond differently to the same cleaning process; a method that removes a stain may also roughen a brick face, discolor stone, or drive water into open joints. Start with diagnosis and the least aggressive method likely to work, not with the strongest available cleaner.
Before cleaning, document the area and check for:
- Loose or powdering mortar, open joints, cracks, and detached masonry
- Soft, flaking, or previously damaged brick or stone faces
- Failed sealant, recurring dampness, or water entry near the stain
- The stain’s location, color, pattern, and whether it returns after rain
- Earlier cleaning or coating work that may affect the surface
The pattern can help guide investigation, but it is not a diagnosis. Rust-colored marks below a metal lintel may warrant inspection of the lintel and surrounding masonry; dark streaks below a ledge may point to repeated runoff; white deposits may be salts left behind as moisture evaporates. Identify and address the likely source before treating the appearance. Cleaning a recurring stain without correcting the water path can lead to repeat work.
For a controlled cleaning plan, have the contractor test the proposed method on a small, inconspicuous area and allow the surface to dry before judging the result. Compare the test with an untreated area for color change, surface texture, and remaining deposits. Agree in advance on the acceptable result and how runoff will be managed, especially near entrances, landscaping, and occupied areas. If the test damages the surface or fails to remove the deposit, stop and reassess rather than expanding the work.
Cleaning should usually wait when mortar is loose, the wall is actively wet, or a crack or leak has not been assessed. Water or cleaning solution can enter weak joints, obscure evidence of the source, or leave a vulnerable surface wetter for longer. Repair the defect and resolve the moisture problem first, then decide whether cleaning is still needed.
Watch out: Do not assume that higher pressure, stronger chemicals, or abrasive tools will produce a better result; aggressive treatment can permanently damage masonry and make future maintenance harder.
After cleaning, record the method, test location, date, and result, then recheck the area after it has dried and during a later inspection. This adds a practical decision process often missing from general cleaning advice: identify, test, compare, and verify before treating the full facade. A study titled Green Maintenance for Historic Masonry Buildings describes a life-cycle assessment approach to comparing maintenance choices; the available summary does not establish that one cleaning method is universally better. The sound choice is the one that addresses the deposit while preserving the existing material and avoiding unnecessary repeat work.
Prioritize Cracks, Loose Units, and Mortar Deterioration
Cracks, loose units, and crumbling mortar need different responses, and loose masonry or signs of movement should rise to the top of the repair list. A stable surface crack may need monitoring. A loose brick above a walkway creates a more immediate safety concern and needs prompt attention.
The common advice to “patch every crack” misses the main issue: the repair must fit the cause and the surrounding material. Mortar deterioration can leave a joint open to water, while a crack may reflect movement that a surface patch cannot solve. At Solid Rock Brick Masonry, proper crack repair is an area where workmanship matters.
Use this order when planning work:
- Make the area safe if pieces are loose or falling.
- Record the defect with its location and a photo.
- Check for change by comparing with earlier notes.
- Ask for an assessment when cracks widen or return.
- Plan the repair around cause, material, and exposure.
Watch out: don’t scrape or patch a moving crack before its cause is assessed; a quick cover can hide changes that matter. If mortar is breaking away, see our guide to repairing crumbling brick mortar. For facade damage that may affect safety, limit access near the area until a qualified professional checks it.
Budget for Repairs and Keep a Masonry Maintenance Record
A masonry maintenance record helps property managers plan repair costs by showing what changed, what work is pending, and which areas keep failing. Set aside a capital reserve based on the building’s condition and known repair needs. Don’t rely on a generic cost estimate: scope, access, material, and the cause of damage all affect a quote.
The U.S. masonry market estimate is not a guide to a building’s maintenance budget. It says nothing about a specific property’s repair costs. Instead, use inspection notes to group work by urgency and avoid treating every item as an emergency.
Track these details for each finding:
- Date and exact wall or feature location
- Defect type and severity rating
- Photo from a repeatable angle
- Temporary safety action, if needed
- Assessment, repair status, and follow-up date
This record also helps when staff or contractors change. What most guides miss is that a repair history can reveal a recurring water path or a patch that did not last. For planning factors, review our masonry repair cost guide, then request a site-specific quote for the work.
Choose Compatible Repairs and Know When to Call a Mason
Compatible repairs use materials and methods that suit the existing masonry and the cause of the damage. A patch that looks neat at first can still fail if it does not match the wall’s needs. The right choice depends on the material, the location, and whether movement or moisture continues.
Restorative masonry can preserve sound brick or stone, while replacement may fit areas with severe damage. Neither option is right for every wall. A professional assessment helps separate surface wear from structural damage and can guide repair priorities.
Ask these questions before work begins:
- What is causing the crack or mortar loss?
- Does the repair match the existing masonry?
- Will the work address water entry or movement?
- What areas need follow-up after the repair?
- How will the site be cleaned and left?
Solid Rock Brick Masonry notes that masonry work often takes more than one day, with a second day commonly needed for cleanup and follow-up repairs. Check reviews before choosing a contractor, and ask how the repair will address the cause, not just the visible mark. For help weighing restoration against replacement, see masonry restoration or replacement.
Request a Masonry Assessment from Solid Rock Brick Masonry
A masonry assessment is the right next step when cracks grow, mortar keeps falling out, water returns, or masonry becomes loose. Bring your inspection notes and photos so the discussion starts with the building’s actual condition. Questions about masonry are free at Solid Rock Brick Masonry.
We specialize in crack repair and bring structural expertise to masonry work. A thorough cleanup is part of the service we describe. The right repair still depends on what an assessment finds.
If you’re ready to discuss maintenance needs, explore Solid Rock Brick masonry services or contact Solid Rock Brick.
Aging mortar, recurring water, and new cracks can make it hard to know what needs attention first. Solid Rock Brick Masonry specializes in crack repair and offers free answers to masonry questions. Get started with Solid Rock Brick Masonry and discuss a repair plan based on your building’s needs.
Frequently Asked Questions
How often should commercial masonry be inspected?
Set a periodic inspection schedule that includes a thorough annual review and additional checks after severe weather or visible changes. Inspect the masonry facade, mortar joints, sealants, lintels, and areas where water collects. Record the date, location, and condition of each issue so changes are easier to track. The right frequency depends on the building’s materials, exposure, and existing damage.
What should a commercial brick inspection checklist include?
A commercial brick inspection checklist should cover cracks, loose or displaced units, crumbling mortar, open joints, failing sealant, lintels, and signs of water intrusion. Note each finding’s location and severity, then photograph it for comparison at the next inspection. Treat loose masonry or a change that suggests structural damage as urgent and arrange a professional assessment rather than attempting a patch without identifying the cause.
What is the safest way to clean commercial brick?
Start by identifying the brick type, the stain, and the condition of the mortar. Test a small, inconspicuous area with the least aggressive cleaning method that suits the surface, and avoid cleaning that could damage brick faces or joints. Commercial masonry cleaning methods should account for material compatibility and water exposure. If the stain persists or the masonry is deteriorated, ask a masonry professional to assess the surface before broader cleaning.
How can property managers prevent water damage to commercial masonry?
For commercial masonry water damage prevention, inspect sealants and expansion joints, look for gaps around openings, and check that water drains away from the facade. Watch for staining, damp areas, and deteriorating mortar, then document changes and arrange prompt repairs where needed. Routine checks of facades, lintels, and joints support planned asset preservation. If water intrusion continues or damage spreads, have a masonry professional assess the source before choosing a repair.