 how-to
How to Repair Crumbling Brick Mortar: A Step-by-Step Guide
Table of Contents
- Why Mortar Crumbles and When to Repair It
- Tools and Safety Gear You Will Need
- How to Remove Old Mortar from Brick Joints
- Choosing the Best Mortar Mix for Old Brick
- Repointing and Filling the Joints
- Mortar Curing Time and Aftercare
- Conclusion
- Frequently Asked Questions
Last Updated: October 5, 2026
Why Mortar Crumbles and When to Repair It
Crumbling brick mortar is the soft, sandy material that fails between bricks when water, age, or poor mixing breaks down the joint. This guide from Solid Rock Brick walks you through the full repair, from the first inspection to the final cure.
Mortar is the weakest part of a brick wall on purpose. It flexes so the bricks don't crack. When it crumbles, the wall loses that cushion.
Here's what most guides get wrong: they jump straight to mixing new mortar. The real work starts with figuring out why the old mortar failed. Fix the cause or you'll be back in two years.
Common Causes of Mortar Deterioration
Water is the number one cause. Bricks soak up rain, then freeze and expand. That cycle pushes mortar out of the joints, bit by bit.
Other common causes:
- Freeze-thaw cycles that crack the joint surface
- Poor original mix with too much sand or not enough binder
- Bad flashing or gutters dumping water onto the wall
- Age as the lime in old mortar slowly washes out
- Salt and de-icing spray near driveways and steps
Understanding the cause tells you whether a patch will hold or the whole wall needs work.
Repair Thresholds: DIY vs. Professional Help
Not every crumbling joint is a weekend project. Use these thresholds to decide.
| What You See | Likely Cause | Best Move |
|---|---|---|
| Mortar crumbles, bricks solid | Worn joint only | DIY repointing |
| Mortar gone, bricks loose | Deep joint failure | Call a mason |
| Cracks wider than a pencil | Wall movement | Structural engineer |
| Spalling or broken bricks | Water + freeze damage | Pro repair |
| Sagging or bowing wall | Foundation issue | Stop and get help |
If the wall moves, bows, or shows wide cracks, stop. Those are signs of structural damage that no tube of mortar will fix. We refer clients to a structural engineer in those cases.
Tools and Safety Gear You Will Need
A good mortar repair job needs the right tools. You don't need much, but the wrong ones will damage your brick.
Safety gear first:
- Safety glasses (chips fly fast)
- Work gloves
- N95 dust mask for mixing
- Sturdy boots
Masonry tools:
- Hammer and a plugging chisel
- Joint raker or grout saw
- Wire brush and stiff bristle brush
- Trowel and pointing trowel
- Hawk or mortar board
- Bucket and mixing paddle
- Spray bottle for dampening
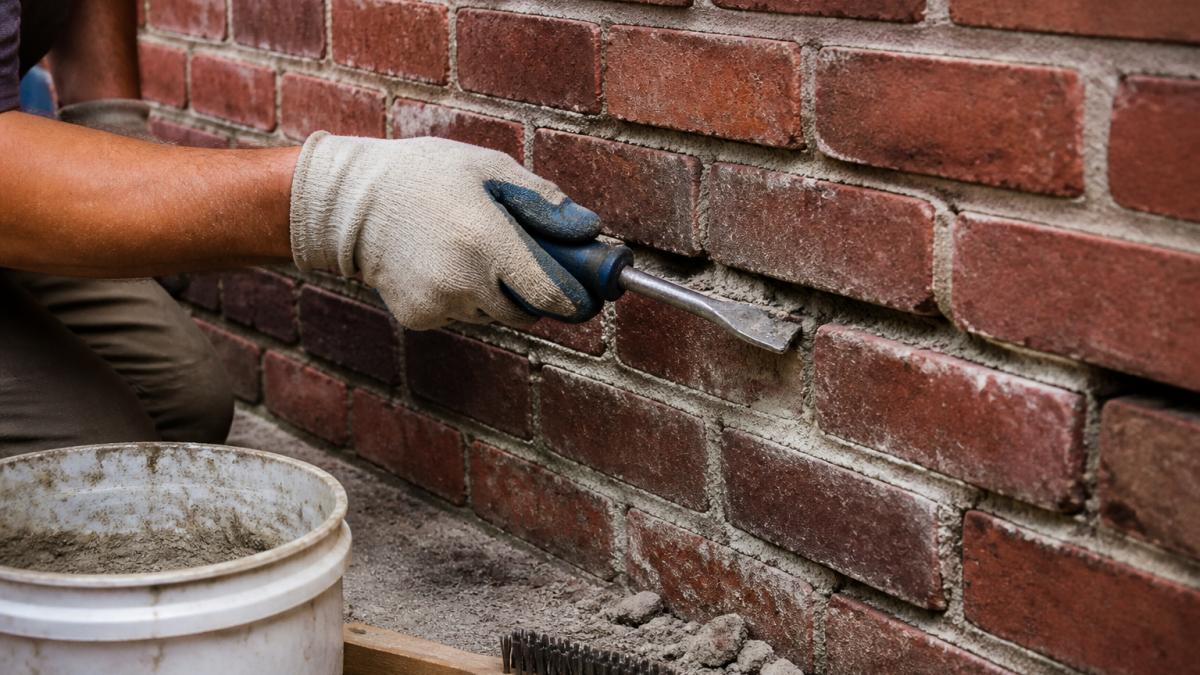
A plugging chisel is the workhorse here. It has a wide, flat tip that fits bed joints and head joints without chewing up the brick edges.
How to Remove Old Mortar from Brick Joints
Learning how to remove old mortar from brick is the step that makes or breaks the repair. Rushing it chips bricks and leaves weak spots.
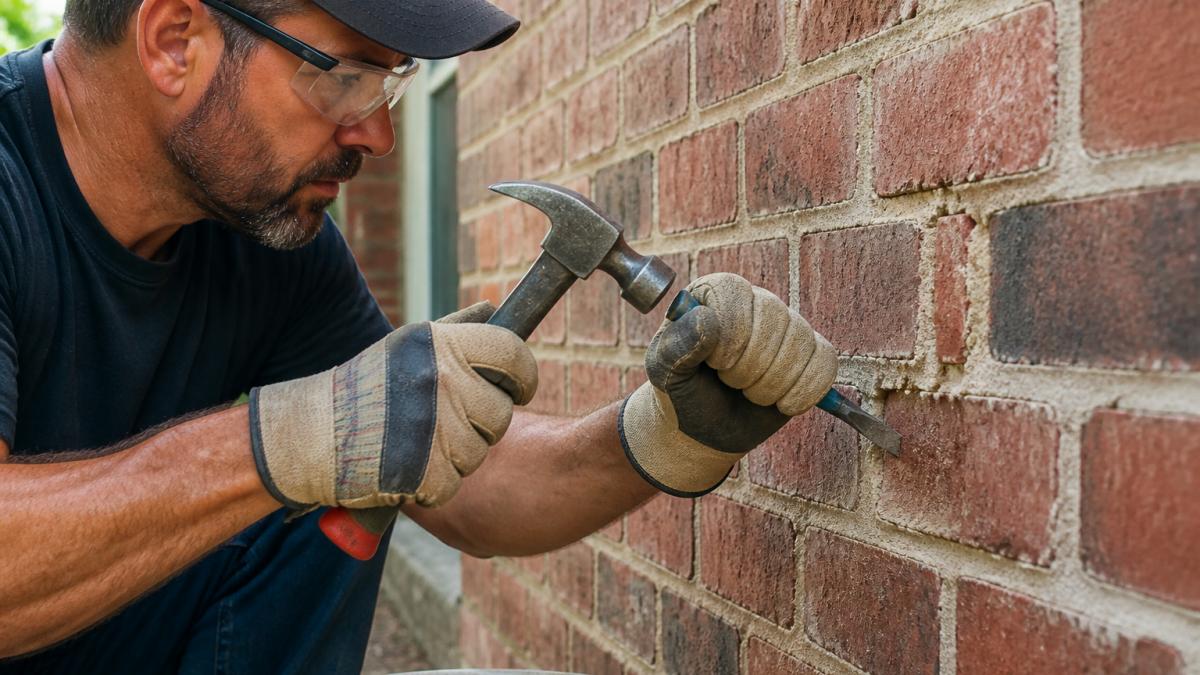
The goal is simple: get the loose, crumbly mortar out and reach solid material. You want a joint depth of about 1/2 to 3/4 inch. That gives new mortar enough grip.
Step-by-Step Removal Process
- Inspect the wall and mark every joint that crumbles or sounds hollow when tapped.
- Test one joint first. If the mortar crumbles easily, you're good to go.
- Hold the chisel at a shallow angle and tap lightly with the hammer.
- Work from the top of the joint down, chipping away in small passes.
- Stop at solid mortar. Don't dig past 3/4 inch or you'll loosen the brick.
- Brush out the dust with a stiff brush, then a wire brush for stubborn bits.
- Dampen the joint with a spray bottle before you fill it.
Work in small sections. A wall is not a race.
Choosing the Best Mortar Mix for Old Brick
The best mortar mix for old brick is a soft lime-based mortar, not a hard modern mix. Old brick is softer than new brick. Hard mortar traps moisture and cracks the brick instead of the joint.
The Compatibility Rule
Mortar should always be softer and more permeable than the brick it holds. That way, when the wall moves or takes on water, the mortar sacrifices itself instead of the brick.
A simple field test: scratch the brick with a screwdriver. If the brick scratches easily, it is soft and needs a soft mortar. If the brick resists the screwdriver, it can take a harder mix.
The ASTM Mortar Types
Modern mortar is classified by ASTM C270 into five types. Strength runs from highest to lowest: Type M, Type S, Type N, Type O, Type K.
| Type | Compressive Strength | Typical Use |
|---|---|---|
| M | Highest | Load-bearing walls, below grade, severe exposure |
| S | High | Exterior walls at grade, moderate exposure |
| N | Medium | Above-grade exterior walls, most repointing |
| O | Low | Interior walls, soft historic brick |
| K | Lowest | Historic restoration, very soft brick |
For most exterior repointing on older homes, Type N is the safe default. For very old, very soft brick, think pre-1930 masonry, Type O or a lime putty mortar is a better match.
Cement vs. Lime Mortar
Old brick was laid with lime mortar, not Portland cement. Lime mortar is softer, more breathable, and self-healing at the surface. Portland cement mortar is harder and less permeable. Repointing old lime-mortared brick with a Portland-heavy mix is the classic way to crack the brick face.
If you're unsure what the original mortar was, look at the color and texture. Lime mortar is usually pale, chalky, and sandy. Cement mortar is grayer and harder.
Pre-Mixed vs. Site-Mixed
Pre-mixed repointing mortars are convenient and consistent. Site-mixed gives you control over color and strength. For small repairs, pre-mixed is fine. For historic work or large jobs, site-mix with a lime-based blend and match the original color with a mortar pigment.
Type N vs. Type O Mortar
| Feature | Type N | Type O |
|---|---|---|
| Strength | Medium | Low |
| Best for | Exterior walls, moderate weather | Interior walls, mild weather |
| Flexibility | Good | High |
| Use on old soft brick | Yes | Yes |
| Use on new hard brick | Sometimes | No |
Type N suits most exterior walls. Type O is softer and better for very old, very soft brick.
Match the mortar to the brick, not to the job speed. A soft mortar protects old brick. A hard mortar destroys it.
Repointing and Filling the Joints
Repointing is the act of packing new mortar into the cleaned joints and shaping it to match the wall. Do it right and the repair lasts decades. Do it wrong and you'll be back on the same wall in two winters.
Joint Depth and Preparation
Before any mortar goes in, the joint has to be the right depth. The target is about 1/2 to 3/4 inch of clean, square-edged joint. Shallower than 1/2 inch and the new mortar has nothing to grip.
Dampen the joint with a spray bottle before filling. Dry brick wicks water out of the fresh mortar and weakens the bond. The wall should be damp to the touch, not wet.
Mixing the Mortar
Mix to a peanut-butter texture. Not too wet, not too dry. A wet mix is easy to trowel but shrinks and cracks as it cures. A stiff mix is harder to pack but bonds better and lasts longer.
Let the mix sit for about 10 minutes, then remix before use. This is called slaking and it improves workability. Mix only what you can use in about 30 minutes, mortar starts to set fast.
How to Fill a Joint
- Dampen the joint again so it doesn't suck water from the mix.
- Load a small amount onto your pointing trowel.
- Press the mortar into the joint with firm, short strokes.
- Pack it in layers if the joint is deep. Don't fill it in one go.
- Let each layer set slightly before adding the next.
- Tool the joint to match the original profile once it firms up.
Work in small batches. Mortar starts to set in about 30 minutes, so mix only what you can use.
Tooling the Joint
Tooling is what makes the repair look original and what seals the surface. Use a jointer that matches the existing profile, a rounded jointer for concave joints, a flat one for flush joints. Run it along the joint with steady pressure once the mortar has firmed up but before it sets hard.
Tooling compresses the mortar against the brick and closes the surface. Skip it and the joint stays porous and crumbly.
Bond and Quality Checks
After the mortar sets, check the bond. Tap the joint with a metal tool. A hollow sound means the mortar didn't bond and needs to come out. A solid sound means you're good.
Look for hairline cracks along the joint edge. Those usually mean the mix was too wet or the joint wasn't dampened enough. Both are fixable on the next batch.
Common Mistakes
- Filling the joint in one pass instead of layers
- Using a hard cement mix on soft brick
- Skipping the dampening step
- Tooling too late, when the mortar has already set
- Leaving the joint proud of the brick face instead of matching the profile
For larger jobs, Solid Rock Brick handles full repointing on brick walls where the damage covers more than a few joints.
Mortar Curing Time and Aftercare
Mortar curing time depends on the mix and the weather, but most joints reach working strength in about 24 to 48 hours.
Here's the part most guides skip: curing is not drying. Mortar needs moisture to harden properly. If it dries too fast, it turns weak and dusty.
Aftercare checklist:
- Keep the wall damp for 2-3 days with a light mist
- Cover the work if rain or hard sun is coming
- Avoid freezing temps for the first 48 hours
- Don't pressure-wash for at least a week
- Wait 30 days before applying a masonry sealer
Weather matters more than most people think. Hot, dry, or windy days pull water out of the mortar too fast. Cold snaps stop the cure completely.
The Portland Cement Association's guidance on mortar curing explains why moisture control is the key to strong joints. For weather prep, the National Weather Service forecast tools help you plan around rain and freezes.
If you want to protect the finished wall long-term, a breathable masonry sealer guide from the Brick Industry Association covers which products let the wall breathe and which trap moisture.
Conclusion
Crumbling brick mortar will not fix itself, and every freeze-thaw cycle makes it worse.
For walls that are bowing, cracking wide, or losing bricks, the job needs a pro. Solid Rock Brick brings 16 years of experience to brick work, stone work, and concrete repair for homes and businesses.
Get started with Solid Rock Brick and restore your brick wall the right way.
Frequently Asked Questions
Will new mortar stick to old mortar?
New mortar will stick to old mortar only if the old surface is clean, sound, and properly prepared. Remove all loose or crumbling brick mortar first, then dampen the area before applying the new mix. If the old mortar is too smooth or contaminated, the bond will fail. For best results, remove at least 1/2 to 3/4 inch of the old joint depth before repointing.
How deep should you remove old mortar before repointing?
Remove old mortar to a depth of about 1/2 to 3/4 inch (13 to 19 mm) to create enough space for the new mortar to grip. If the joint is too shallow, the replacement mortar will not hold. Use a hammer and chisel or a joint raker to chip away the old material, then brush out dust and dampen the brickwork before filling.
Can you repair crumbling mortar yourself?
You can repair crumbling brick mortar yourself if the damage is limited to isolated joints and the bricks are in good condition. For large areas, structural cracks, or spalling brick, hire a professional. DIY repointing requires patience and the right tools, but it is manageable for small sections. Always test a small area first to confirm your mortar mix matches the existing color and hardness.
How long does mortar take to cure after repair?
Mortar curing time depends on weather and mix type. In general, mortar sets in 24 to 48 hours but reaches full strength after 28 days. Keep the repaired area damp for the first few days and protect it from direct sun, wind, and freezing temperatures. Avoid washing or sealing the wall until the mortar has fully cured.